3D glasses for any VESA-compliant stereo port

this is an add-on to my earlier project: making 3D glasses for a Silicon Graphics
Last week I posted a project in which I adapted 3D glasses to the StereoView Port, a port which a lot of old SGI boxes have. Now SGIs of course aren’t the only computers which can connect to 3D glasses (not in a long way) and after I got this working and also because of some comments, I thought that it would be very nice if these glasses would work on just any VESA-compliant stereo port, a port which is used on lots of (older and newer) professional 3D OpenGL-cards, like NVidia’s Quadro-line and ATI’s FireGL-cards.
Now I already happened to have an old (very old!) ATI FireGL4 which I bought cheap one day (29 euros and that’s 2 years ago). I bought it for my current workstation, but the linux drivers were so old, that it would date my whole system (it needs a 2.4 kernel and XFree instead of Xorg) and I didn’t want that and settled for a NVidia 6800GS in the end, also with dual DVI-ports, but with more current linux drivers.
But, this old card is perfect for this project:
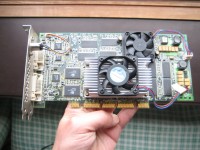
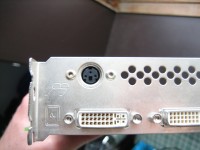
ATI FireGL4 with VESA miniDIN-3 stereo port
click to enlarge
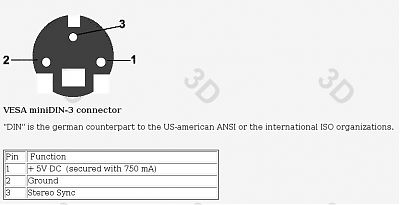
VESA miniDIN-3
click to enlarge
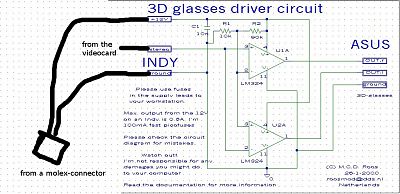
Now in all, it’s not too complicated what I do here. The SGIs have around 10-12 volts on the stereo port, while (same connector, same pin-out) the VESA stereo port has 5 volts on pin 1. In short, what I do here is only taking the stereo sync signal (pin 3) of a VESA-compliant stereo port and get 12 volts and ground from a Molex-connector, so in all we have the same.
The glasses I use(d) are Asus VR100 glasses, if you have different glasses, please find out what the shutter voltage is before you attempt to do anything with it.
The circuit I used in my earlier project, a circuit which has been online for ages (courtesy of Michiel Roos), is meant for old SGIs and the Asus glasses and the VESA port gives 5 volts instead of the 10-12 volts that circuit is expecting. Now I didn’t feel like changing the circuit, because it works so well on my old SGI-boxes and I want to keep using it in that way, but I was also curious to find out if I could make it work on this ATI FireGL card and I made an extension cable which does just that. This way I can still use the circuit on my SGIs and on the ATI FireGL card (or any card with a VESA-compliant stereo port for that matter).
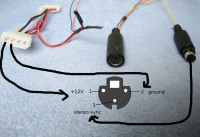
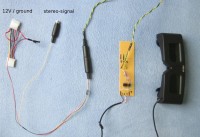
left: the extension cable I made
right: the extension cable and the circuit I made earlier
click to enlarge
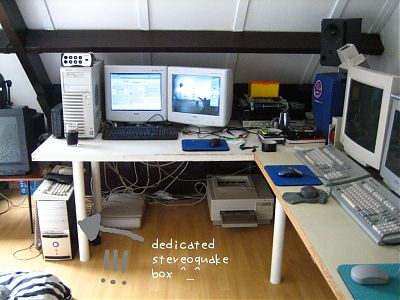
Not only did I happen to have this old ATI FireGL card, I also, somehow without realizing, happened to have everything to build a separate system for this project (a board I used in scramjet number one, the first version of my fully encrypted fileserver). The only thing I missed was an enclosure, but (since I have a day job at a hardware supplier) that was easily fixed.
Similar hardware as what I used can be had for small money if you look around.
The specs of the box I used:
Enlight 460 watt PSU
Asus A7M266
AMD MP1800+ (even though it’s a single CPU-board)
2× 512MB PC2700 (running at 266MHz)
40GB IDE drive
ATI FireGL4, AGP Pro50
Windows XP Pro SP2
make sure, if you start looking around for stuff like this and if you want a board that’ll take older 3D OpenGL-cards, that the motherboard you pick is capable of taking AGP Pro cards as a lot of the older professional 3D OpenGL-cards are AGP Pro. Also make sure you have a decent PSU in your system, since AGP Pro is a design so the video card can draw more power. I suggest you go for something like 450 watts+, your average old 300 watts ATX PSU is probably not up for the job.
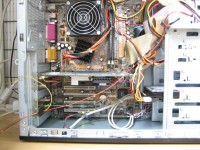
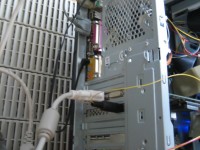
my all-of-a-sudden-extra-box for all this
click to enlarge
If you don’t need to connect these glasses to an SGI or any other non-VESA compliant machine, you can of course skip some connectors. In short, here’s the adapted circuit I used:
And time for some results:
The idea was to install Quake I (a game now twelve years old!), but as far as I know, that needs some patches to be able to play as a stereographic game (and I couldn’t find those patches). So I moved up one version and installed Quake II. I’m a big fan of the Quake-series, but somehow I never got to play Quake II, so it’s actually a surprising game for me right now. When I read the console commands for Quake II, I spotted there is stereographic support in the game, without the need to install patches. In a console you’ll type ‘cl_stereo 1’ and then in my case I have to go to the video menu again and enter one more time on ‘full screen = yes’ before it goes, but… then it goes!
Without glasses it looks like this, you’ll see the picture meant for the left eye and the one meant for the right eye all mixed up.
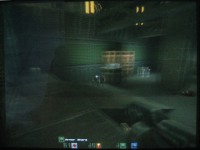
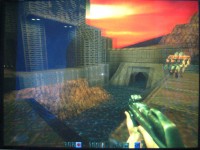
screenshots (as in, photos of my screen), of Quake II
the right picture is taken with IIyama’s OPQ-mode
click to enlarge
And with the glasses, oh my, it’s stereographic Quake! And it’s better than I thought it would be! I now run this on an old 17” IIyama CRT (with Trinitron tube) and even on 800×600 it’s enormous fun! 800×600 at, say, 100Hz is something any decent CRT should be able to do. (Remember that because of the shutter glasses, each eye gets half, with a 100Hz, each eye gets 50Hz.)
Now, because of the nature of shutter glasses, which shut half the time on each eye, you also get half the brightness. My CRT, an IIyama, but there are also other brands with similar modes, has an OPQ (Optimal Picture Quality) mode. It’s actually some sort of exaggerated mode (also called SuperBright sometimes), but in combination with shutter glasses it’s quite ideal. I played Quake II during the day in a sunny room, without OPQ it was hard to find my way in dark levels, but with OPQ on I could play it very well!
I think I’ll start a quest to get an IIyama Vision Master Pro 514 / HM204DT, with a H-sync of 142 kHz. According to RealD, the makers of the CrystalEyes glasses, that’s (one of) the best monitors for this purpose and I could use it on this machine and my Octane. That monitor (afaik) is not in production anymore, so I’ll have to find a second-hand one, but a second-had budget is all I got too, so that seems about right.
By the way, in my earlier project I was talking about getting the right shutter glasses, otherwise you’ll end up looking like Paris Hilton and/or Kanye West, well, guess what? I found a Dutch rap video of The Opposites in which a guy named MC Marboo is wearing CrystalEyes shutter glasses! ^_^
(coincidentally I went to a concert last night, where The Opposites and other rappers performed)


Paris Hilton and Kanye West with their idea of shutter glasses
click to enlarge

MC Marboo with some real CrystalEyes shutter glasses.
stills taken from the video ‘Dom Lomp & Famous’
click to enlarge
The video, Dom, Lomp & Famous (of which I already had a sticker on my bike, but I spottted the CrystalEyes glasses just last night, when I watched the clip again after having been to their concert), is on YouTube and (in better quality) on DailyMotion. Now the clip is in Dutch but I’m sure it’s entertaining for non-Dutch speaking people too. (If you’re easily offended by graphic language, maybe it’s better you don’t understand Dutch ^_^).
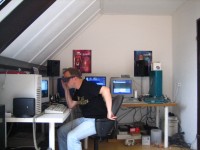
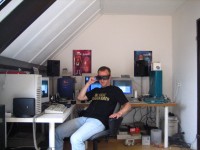
And if rappers can pose with shutter glasses, so can I, right?
Never mind I wear almost the same shirt as these rappers do in said video *^_^*
Habbekrats, the guys who made that video, also happen to be one of my very few clients. I just like what they do and make and I help them out whenever I can. I’m some sort of their full service IT guy. So that’s how I got that shirt and the sticker.
Anyway, long story short. With my previous project and this one, I now have a way of connecting (cheap!) shutter glasses on either SGIs or my box made of old parts, which now is… a dedicated box for playing stereo Quake!
earlier on this site:
Twelve years of Quake
making 3D glasses for a Silicon Graphics
DIY trackback
MAKE:blog
you can find all of my projects overhere
